
Our neighbors at the shipyard. Icebreaker, 270, and the Eagle.
Our neighbors at the shipyard. Icebreaker, 270, and the Eagle.


USS Oak Ridge is our floating drydock for the Constellation. She is a interesting ship in her own right, built in 1943 she served in WWII in the Pacific.


Dry docked at the Coast Guard Curtis Bay Shipyard.
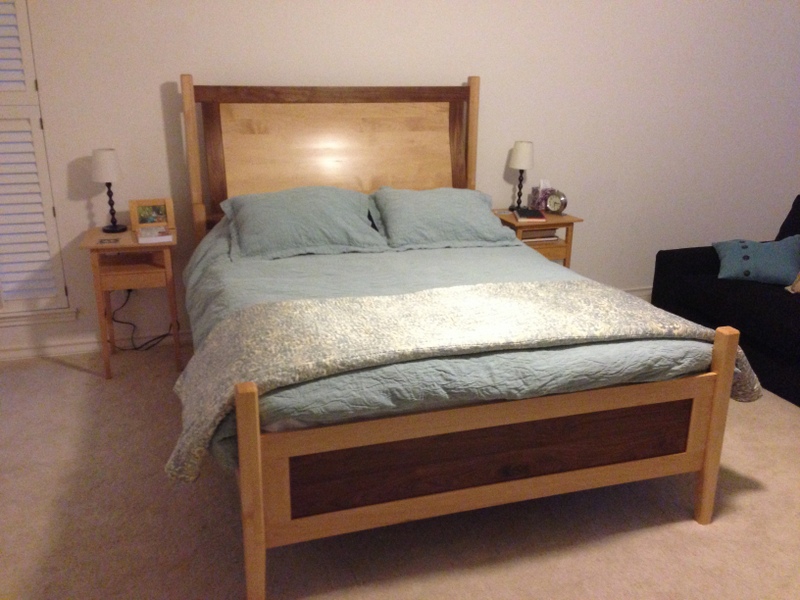
This is a family project and although it doesn’t appear to be boat related, I traded my sister this maple and walnut bed for her kayak.
The sideboards and foot-board are pretty simple flat panel and frame construction.
The headboard is a little more complex. The stiles have about eight laminates to make the s-curve. The maple panel is constructed cooper style with the shaping done with a scraper over a few hours.
Some years ago, I also built the shaker inspired side tables shown in the bedroom photograph.

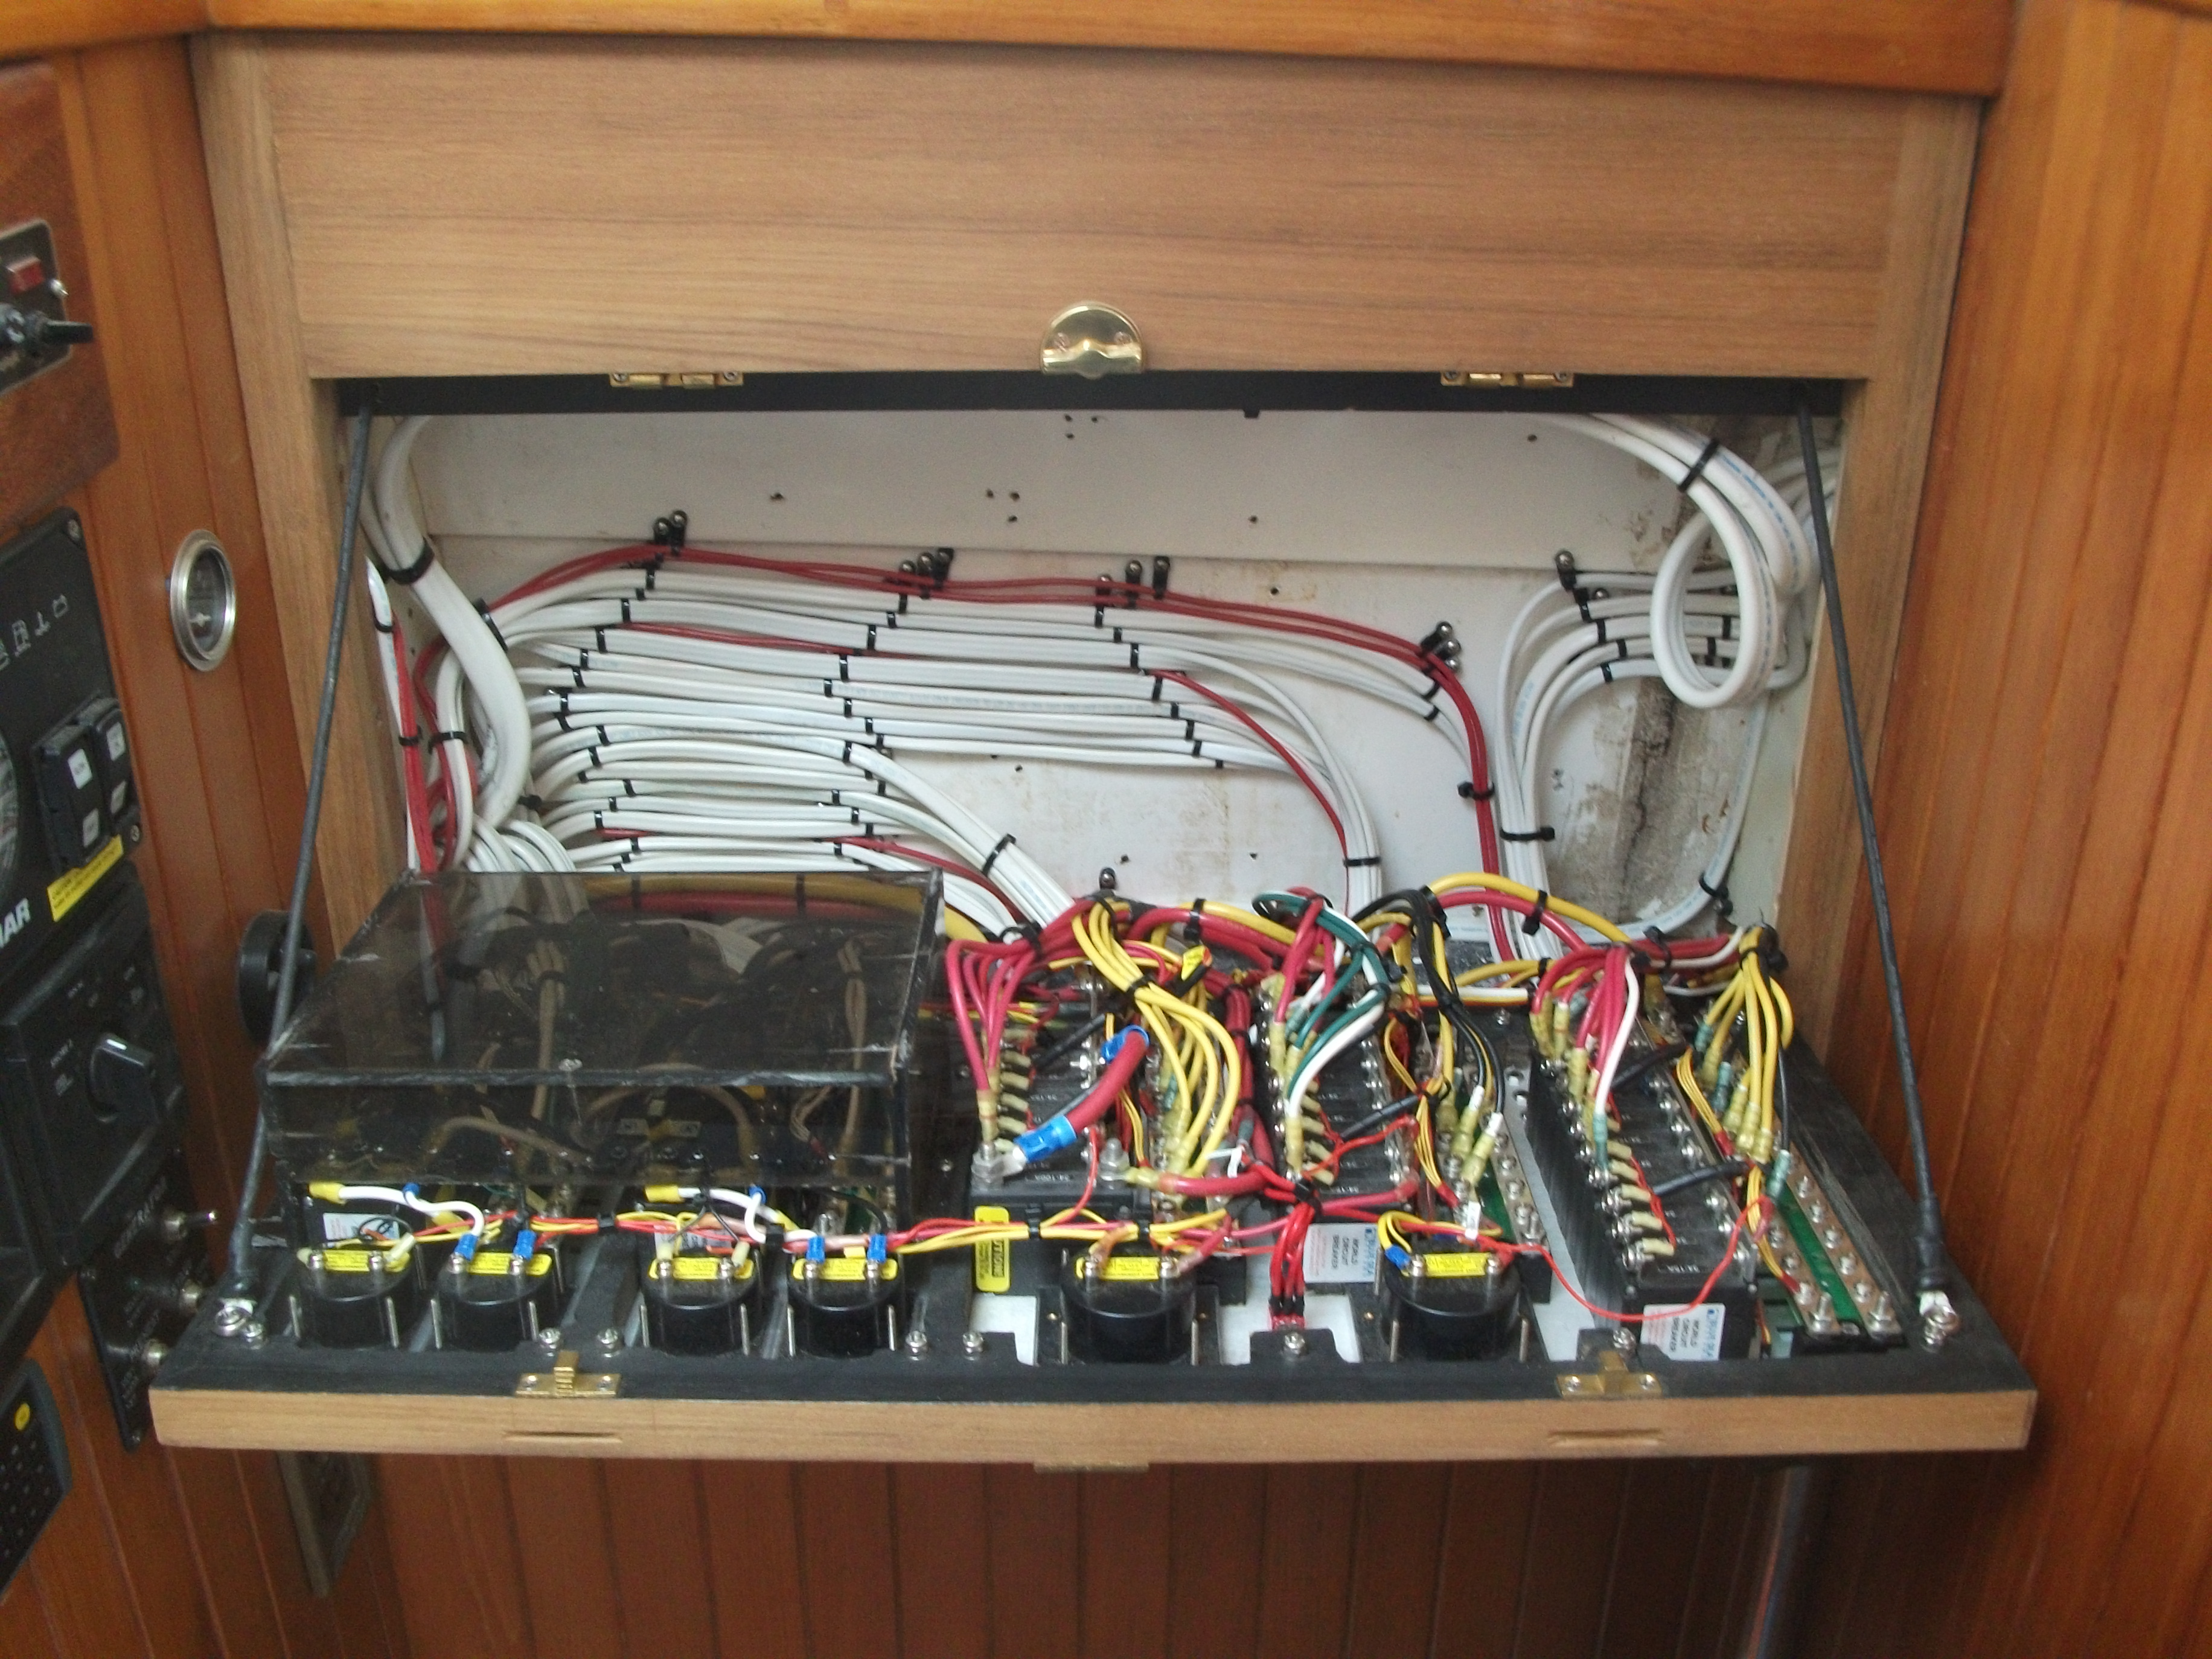
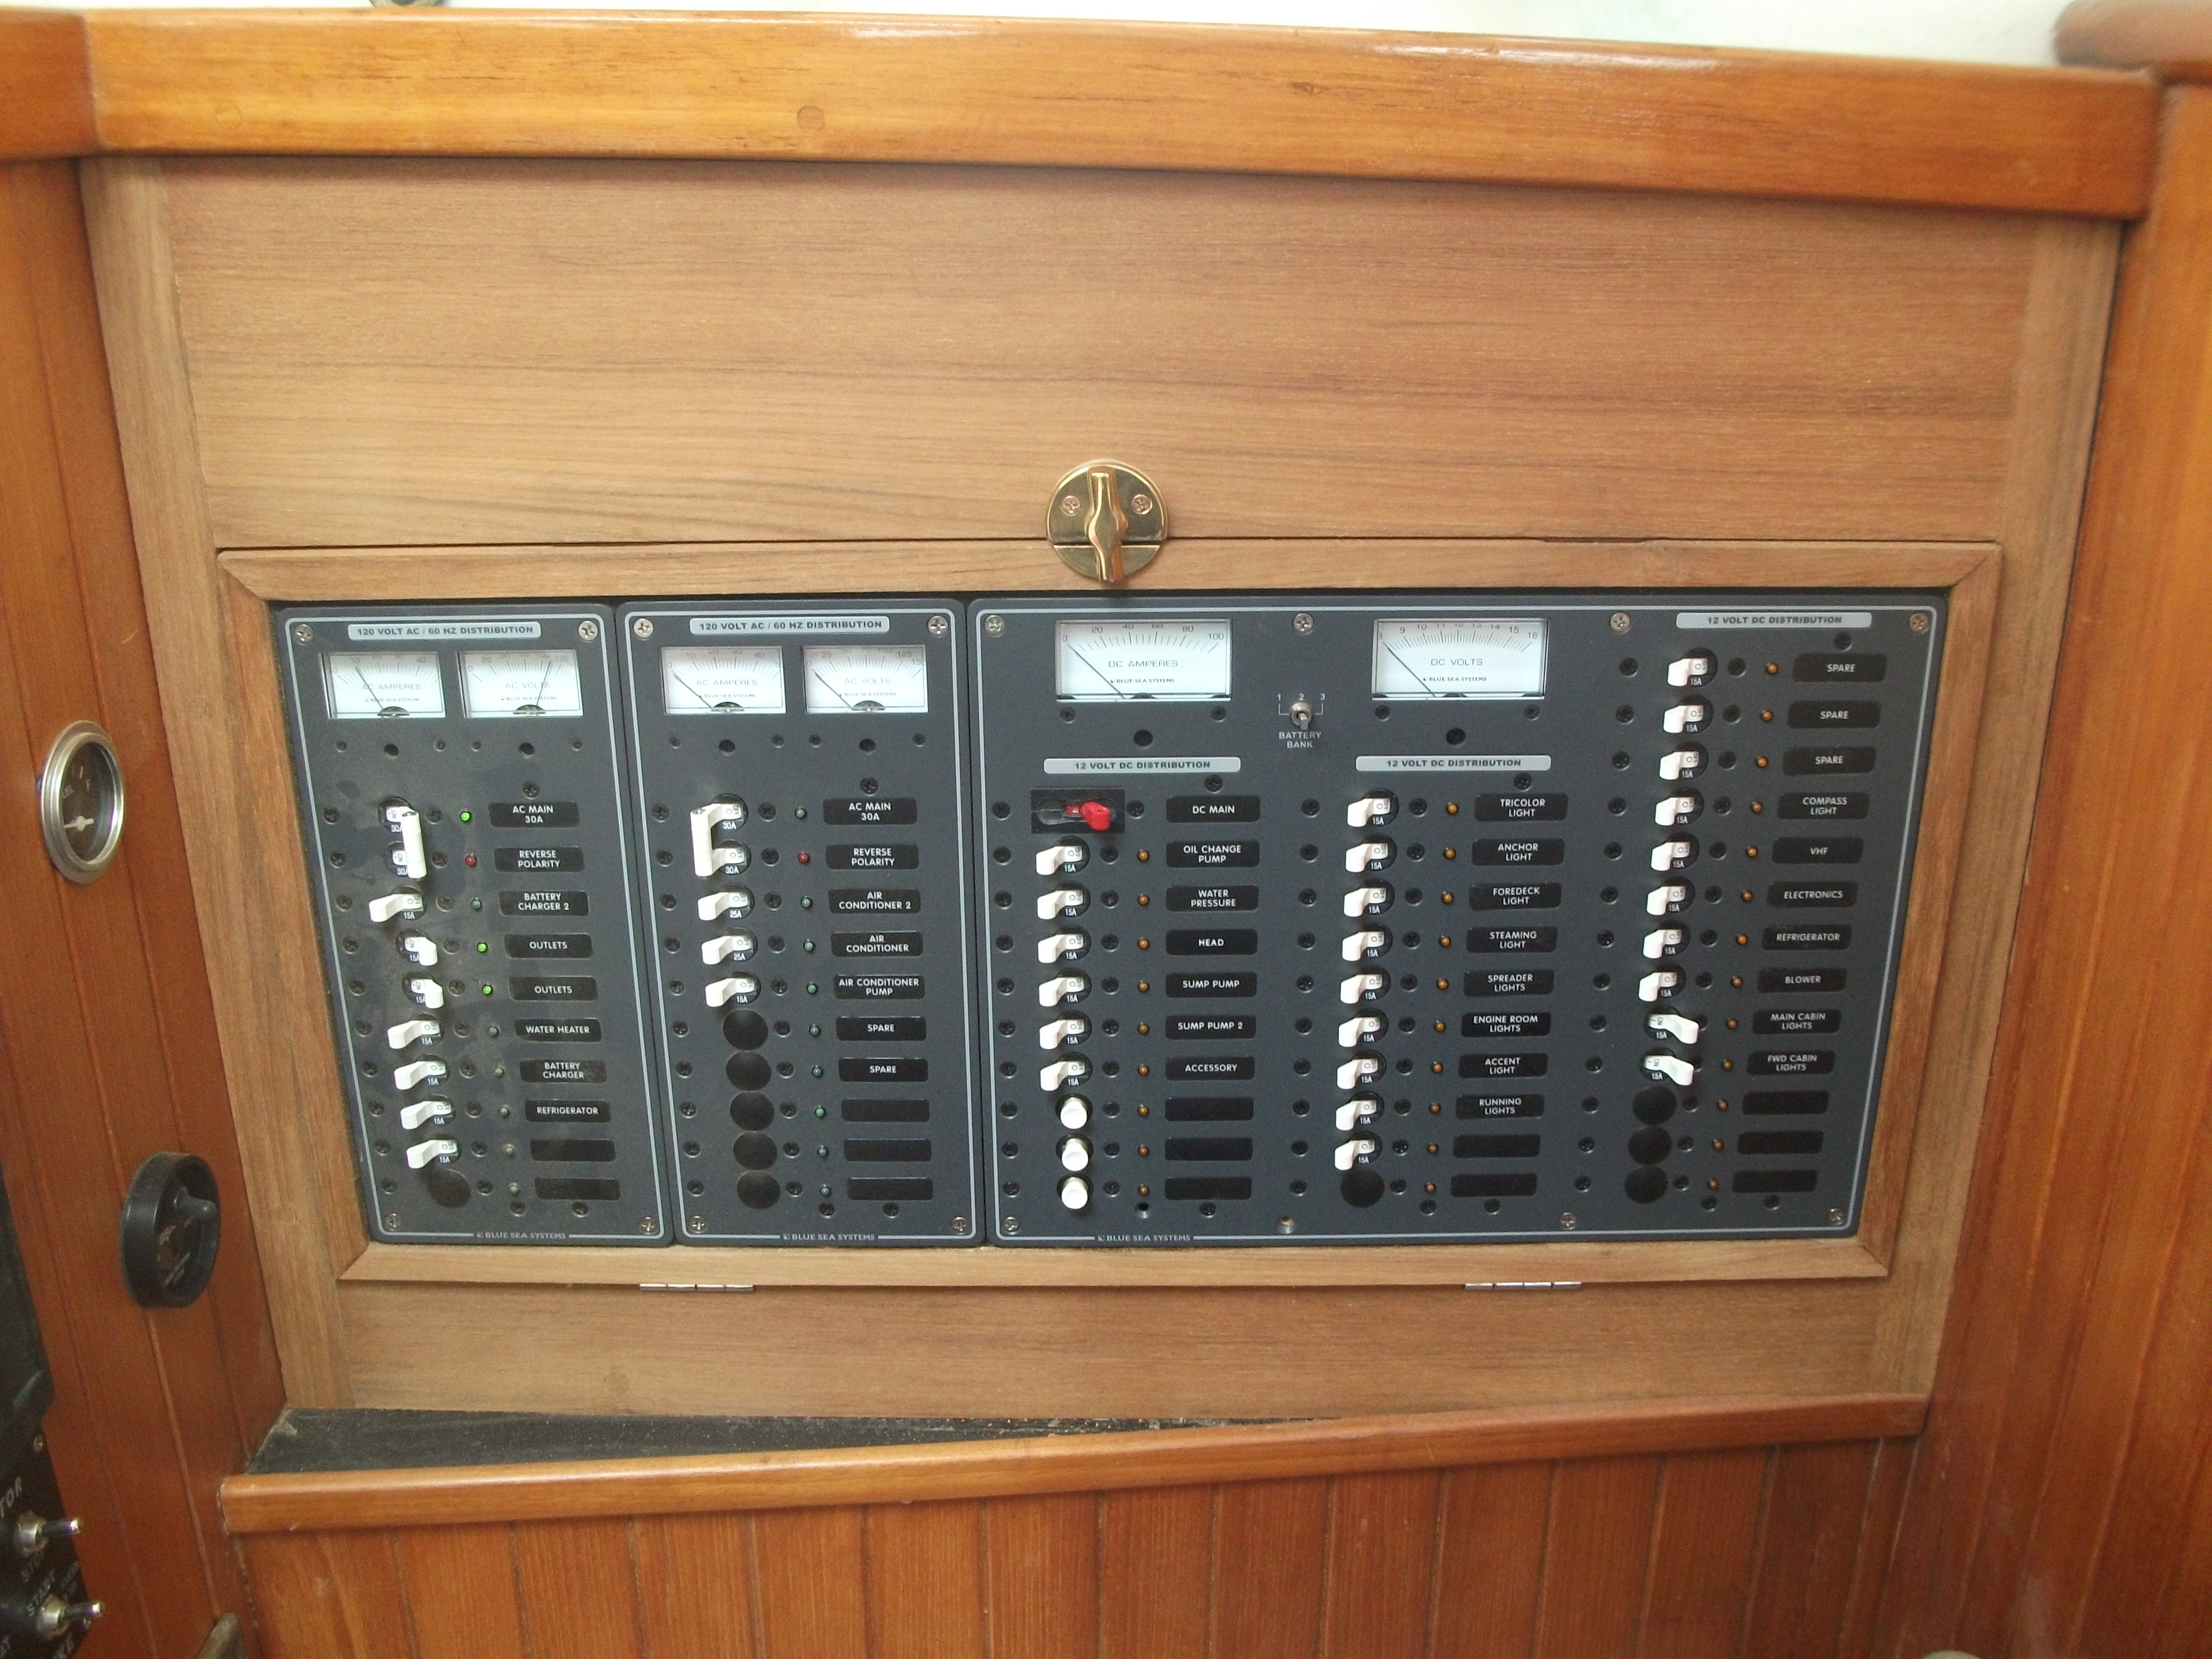
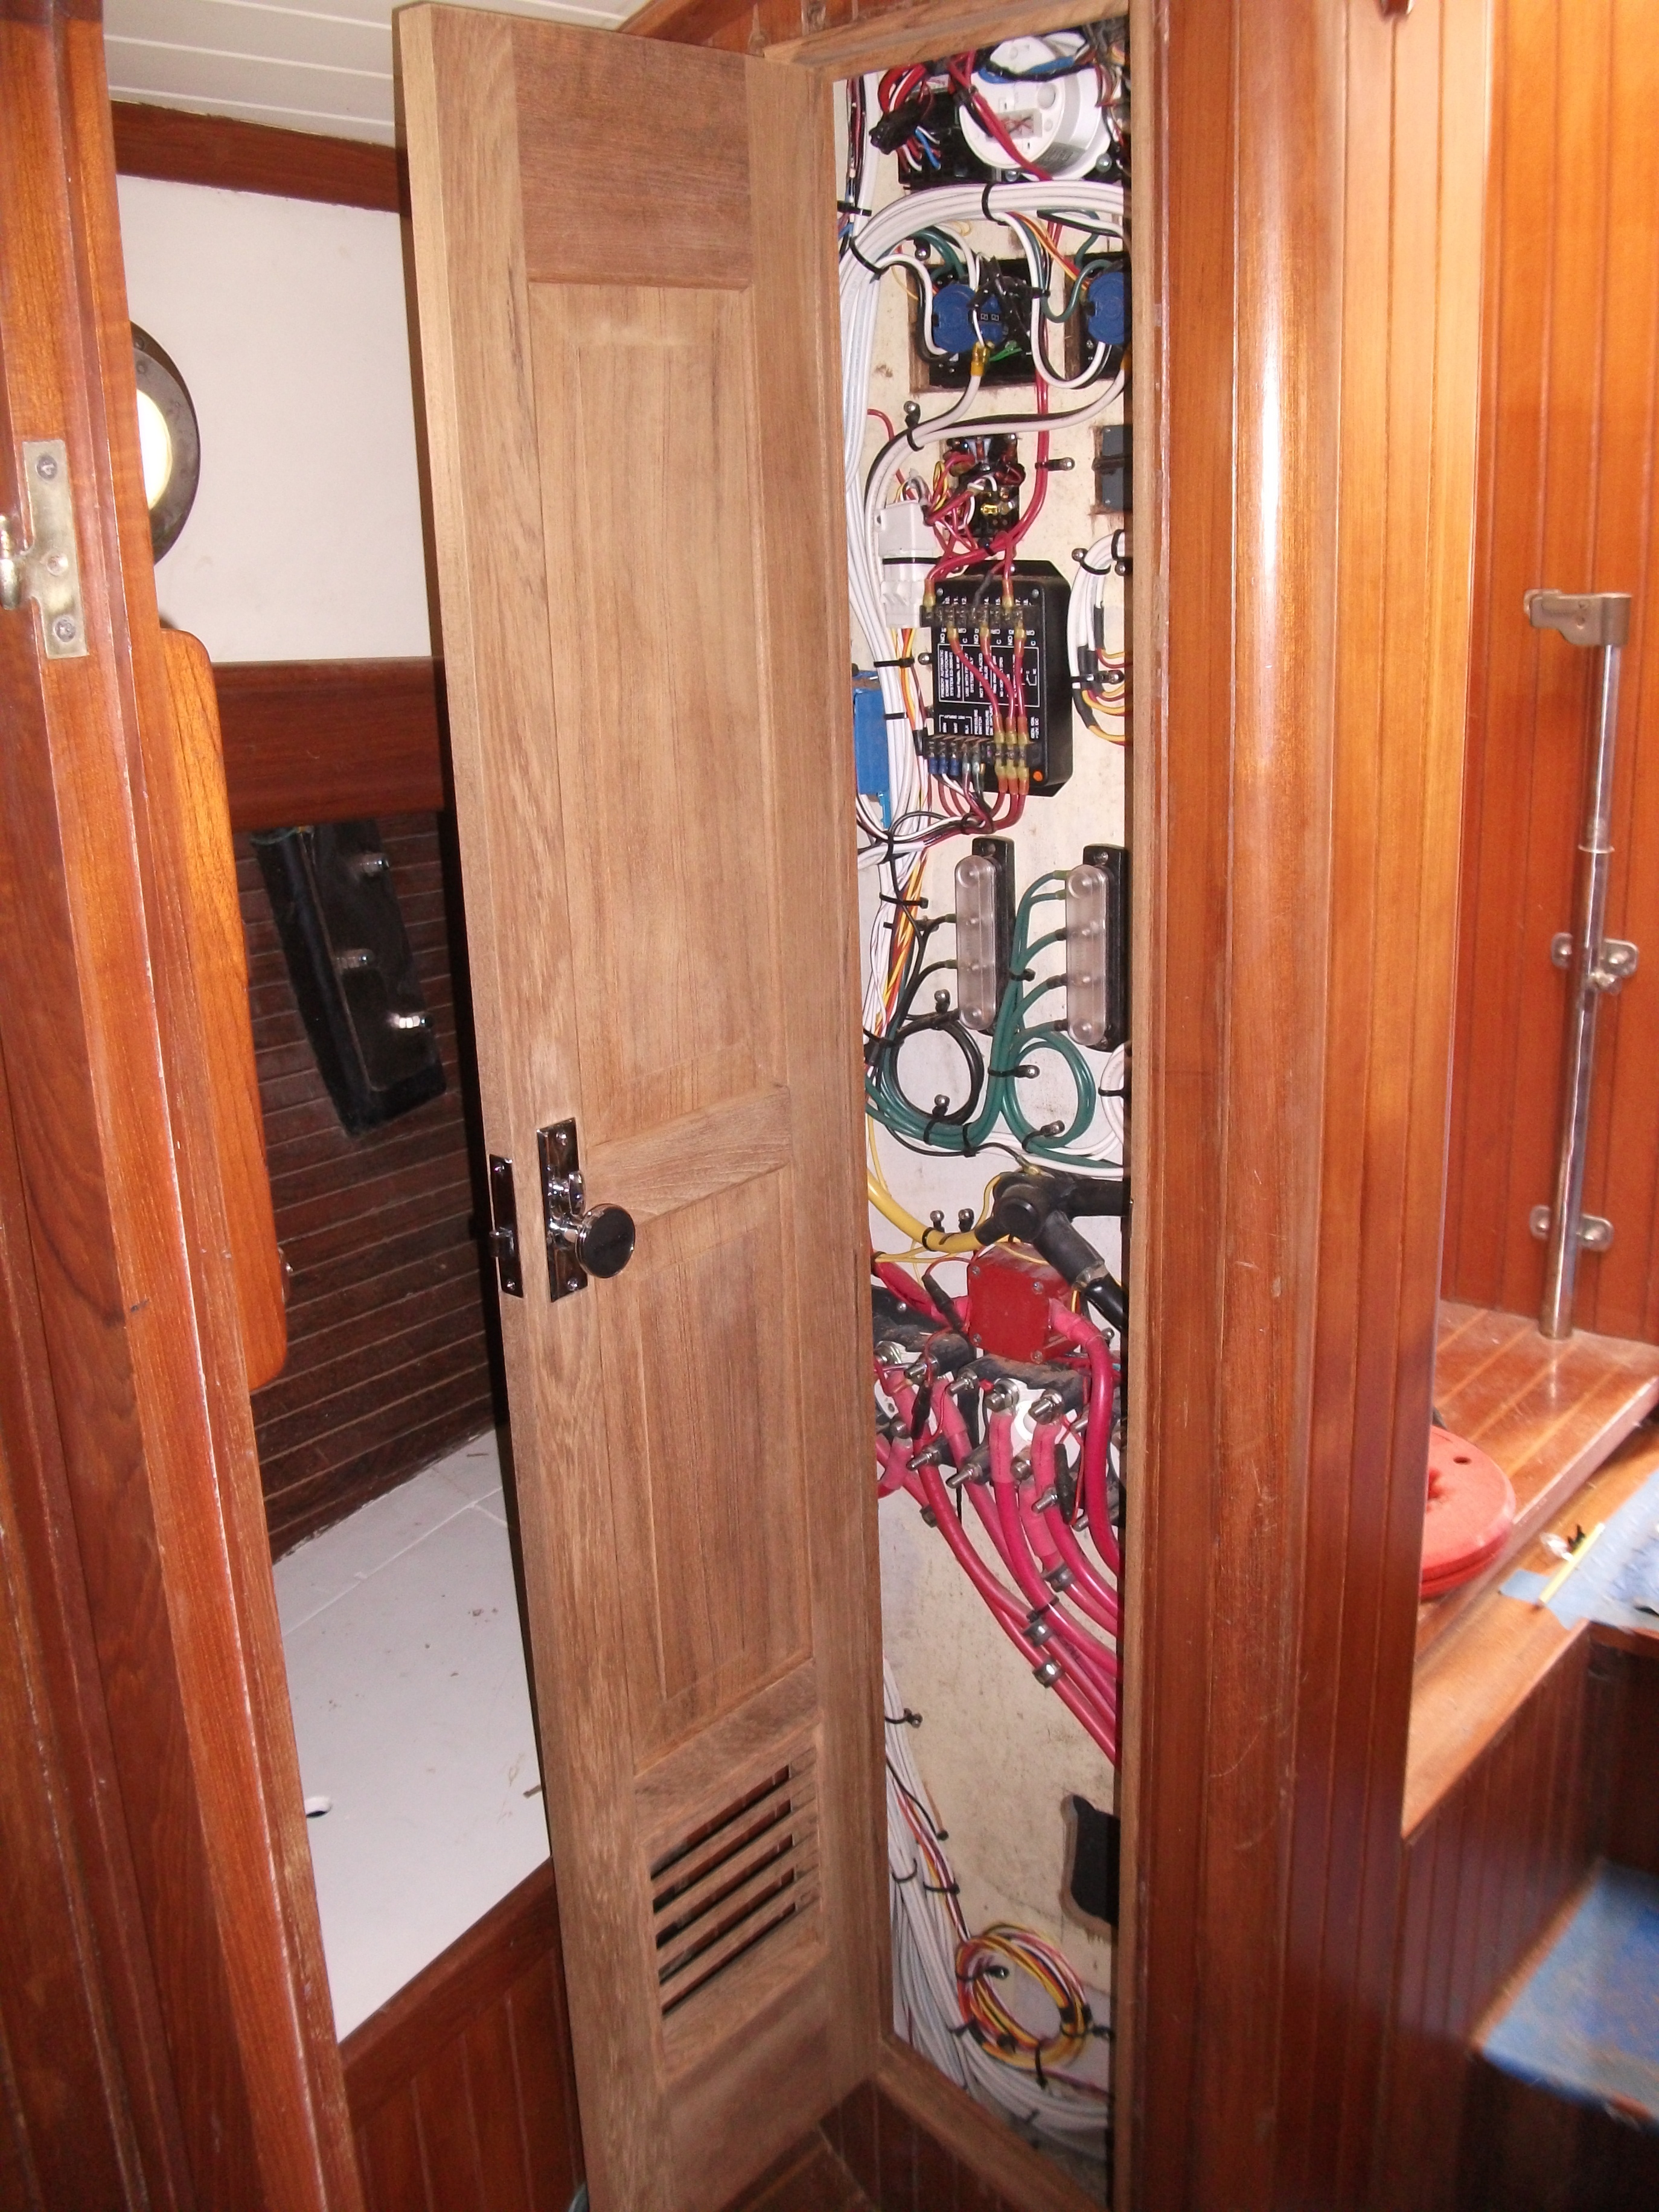
This Hans Christian is undergoing a refit at Pierside Boatworks and needed a new electrical panel and a door to the locker where the electricity is kept.

This gallery contains 6 photos.
This International Optimist is used by the Colington Yacht Club for their youth sailing program in the Outer Banks of North Carolina. My parents currently run the program so I donate my time doing repair work to help repay the … Continue reading
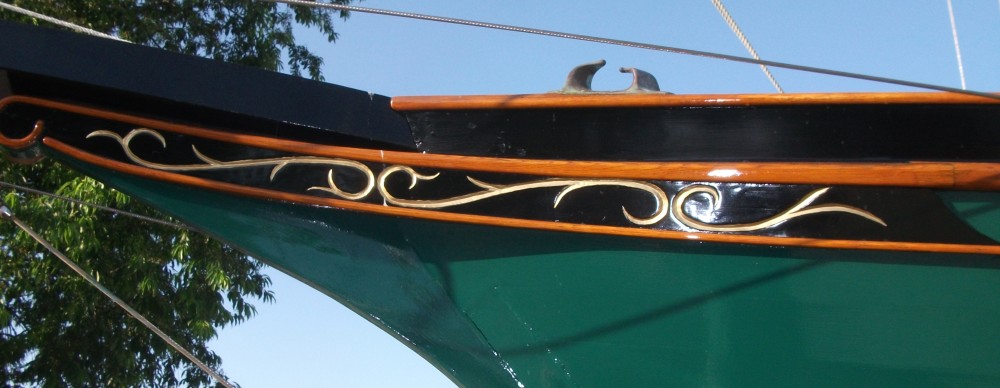
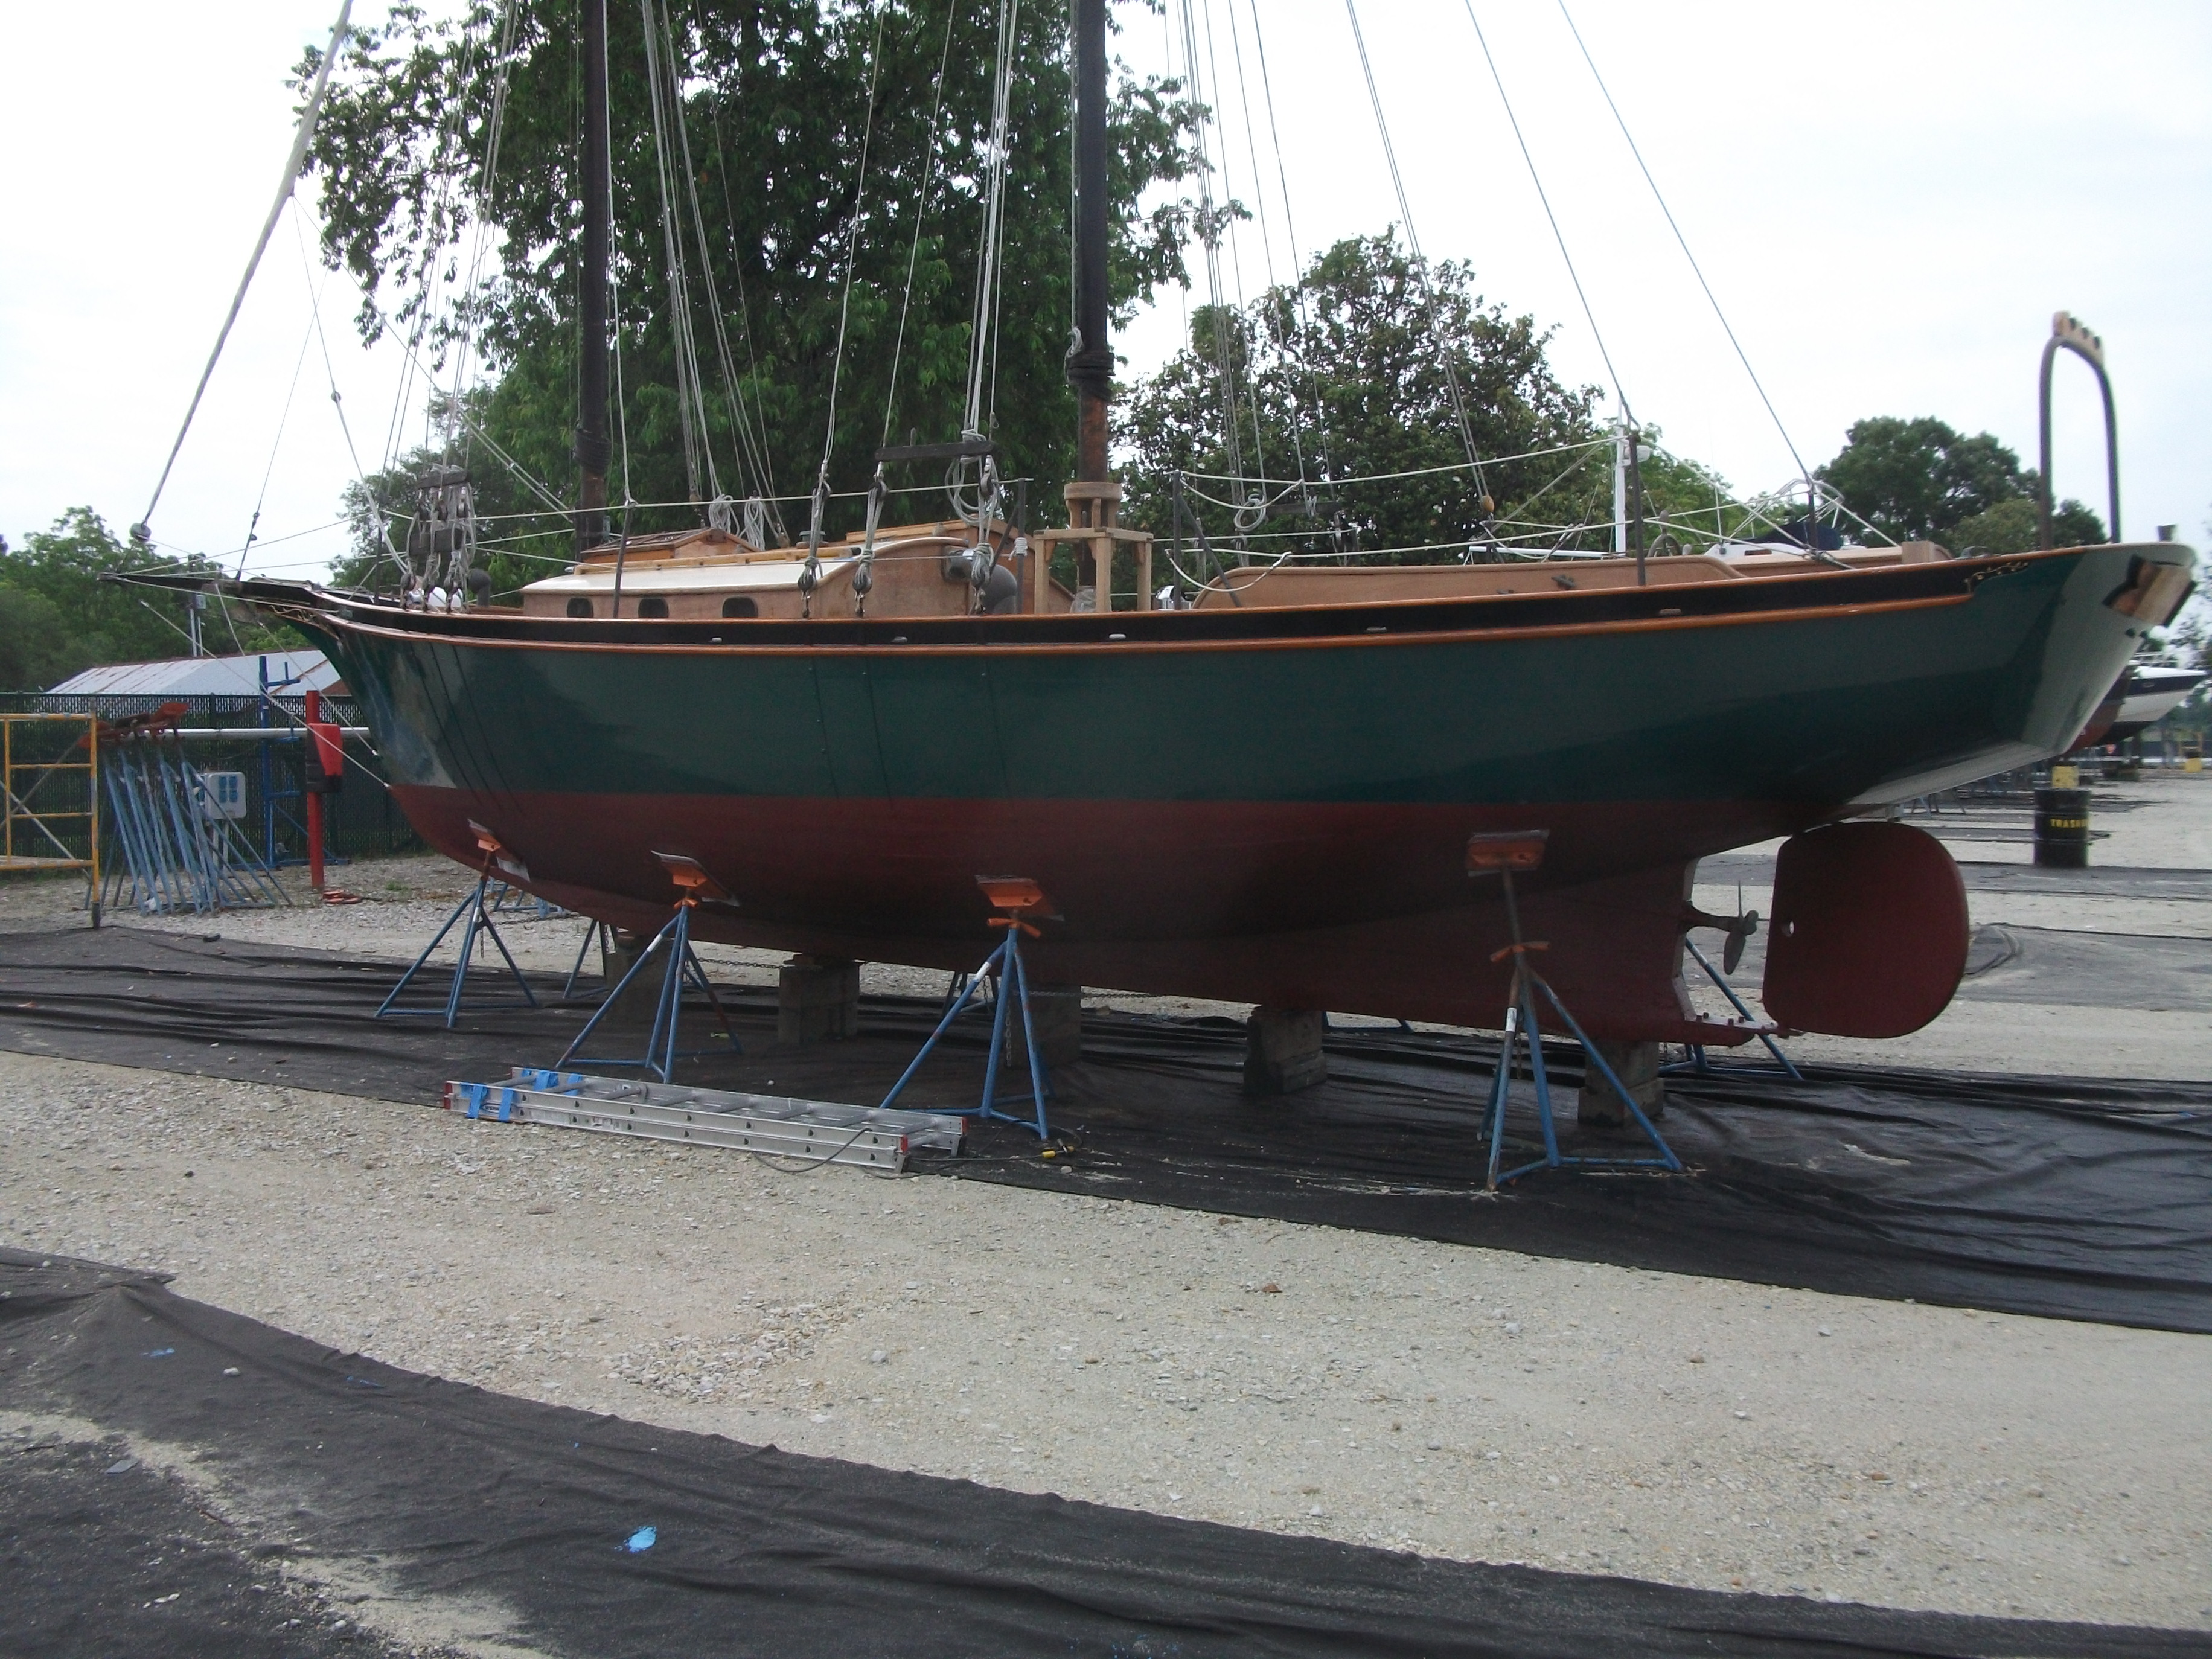
Built in 1961 this Sam Crocker designed schooner was hauled out for regular maintenance. She is 37′ and draws 7′ with the board down. I adjusted the painted waterline to match how she sits at the dock these days, painted her topsides and bulwarks with two coats of one part polyurethane. I applied 7 coats of acrylic urethane to her rubrail and bulwark cap and stripped varnish from the coamings, hatches, and house for the owner to oil. And two coats of gold paint to the carved trailboards.
Frame #2 is situated where the hull sections bolt together so I made four. If it were a one piece hull you would only need two of these frames. The bulkheads are of 4mm okoume and the frames made out of 3/4″ sapele. Once again, I cut laps in the sapele frame pieces then everything is glued together with epoxy resin.

Frame #2 with sides already glued on ready for bottom and top piece to be glued on.

The four frame #2s gluing up.
After the glue had cured and the clamps removed I drilled the 3″ holes in the upper corners of the frames with a drill press and 3″ hole saw. I have a $99 Delta drill press that I sometimes load up in the van for working on the road, hardly an industrial tool, it does a decent job in most applications for cheap. Even spinning a relatively large drill. If you have problems with your drill press bogging down, slow the speed which will increase the torque and hopefully get you through to the other side. I shortened the pilot bit in the arbor of the hole saw so it was just sticking out about a 1/4″ past the saw teeth, this way I could nestle the hole saw right up in the corner of the frame for a perfectly laid out hole. The drill press and hole saw will tend to spin the work piece around so I brace one side of the frame against the post on the drill press before I start drilling. Clamping the work piece to the drill press table is recommended.

Drilling the 3″ holes at low speed.
Then I laid out the holes for the bolts that hold the three sections together using the measurements from the plans. I used a spring loaded metal punch to make a dimple for the drill bit to start at.

Punching the wood.
I started a very laborious process where I took the frame I had just laid out, clamped it to one of the other three frames and drilled an 1/8″ hole at each corner then proceeded to the next frame until each frame was drilled out to 1/8″. Then I took each frame individually and drilled them out to 1/4″ and then 5/16″, the final hole dimension.

Drilling the initial 1/8″ holes.
Careful layout, believing in your layout, and cutting to the line really pay off in situations like this. That said, my fabrication of these four frames, and drilling the bolt holes was not as precise as I would have liked, so… I chose one of the frames to be my template for the other four. I cleaned up the four edges of the template frame, located one of the other three frames back to back (as they would be bolted together on the complete hull) and slid bolts through the bolt holes not allowing them to protrude through the template frame. I used a large pattern bit in my router with the top bearing riding on the template frame and cutting the work piece to the exact dimensions as the template frame.

The router not only makes each frame identical but also cleans the edges of epoxy and any raggedness.
Now the hull sections should line up near perfect when bolted together.
This is the first post documenting my construction of a Gary Dierking designed sailing proa, an overview of the building of this wooden boat and links to Dierking’s website can be found by clicking on the section above titled Dierking Proa, Wa’apa.
Frame 1 of which there are two, one in each of the two bow sections, is built with 4mm marine okoume plywood and off cuts sapele I have lying around the shop. I laid out the frame onto the plywood from the measurements given in the plans and then laid the solid wood onto the plywood to mark for the laps and the length. Cutting ship laps into the hardwood perimeter of the frame is not necessary but they are easily done, fun to cut and, even backed up by plywood, are a slight improvement over a butt joint. I epoxy glued the hardwood sides of the frame first and let the glue set before proceeding. Given that this is a personal project under no time constraints and worked on in small spurts when I have the time I prefer to glue up a little at a time, there is less chance of a big mess of epoxy this way or errors permanently glued into place. I coated the faying surfaces of both the okoume and the hardwood with thin epoxy. I did not use any thickener as I knew I could get a tight gap free joint between the flat surfaces of the plywood and sapele. I did, however, go over every surface again with the thin epoxy to ensure the joint was not starved of glue because of the wood sucking up the first coating of epoxy.

Hardwood epoxy glued and clamped to the sides of frame 1 and frame 1.
After the epoxy has cured on the side pieces I cut and fit the joints for the bottom part of the frame and the deck beam and glued them up in the same fashion. After the glue had dried I cut a hole for the 4″ inspection port to the water tight compartments on either end of the hull. I glued a circular 6mm backing block to the bulkhead as 4mm is not much to hold either screws or bolts.

Completed frame/bulkhead 1

Figuring out solutions to unusual problems is always interesting. This 54′ Paul Mann Sportfisher had a locker in the saloon where the owner wanted a flat screen t.v. but didn’t want to lose the stowage area. I built this drawer mounted on 100 lb. capacity drawer slides so the crew could still get to their snacks, with an extra large (and reinforced) drawer front for mounting the t.v. The DVD player and cable remote receiver are also mounted on the front with a fiddle on the shelf down low for the remotes. The drawer slides are “push to open” so they lock in place when the drawer is closed but I added barrel bolts at the top for extra security.

